Budget Prepping Tips: Affordable Emergency Preparedness Guide for Beginners
Quick answer Start with a simple 72-hour kit. Add one low-cost item each grocery trip. Prioritize water, food, light, first aid, warmth, sanitation, and a basic plan. Confirm any medical or treatment instructions with CDC, FEMA, or your local health department.
Quick summary
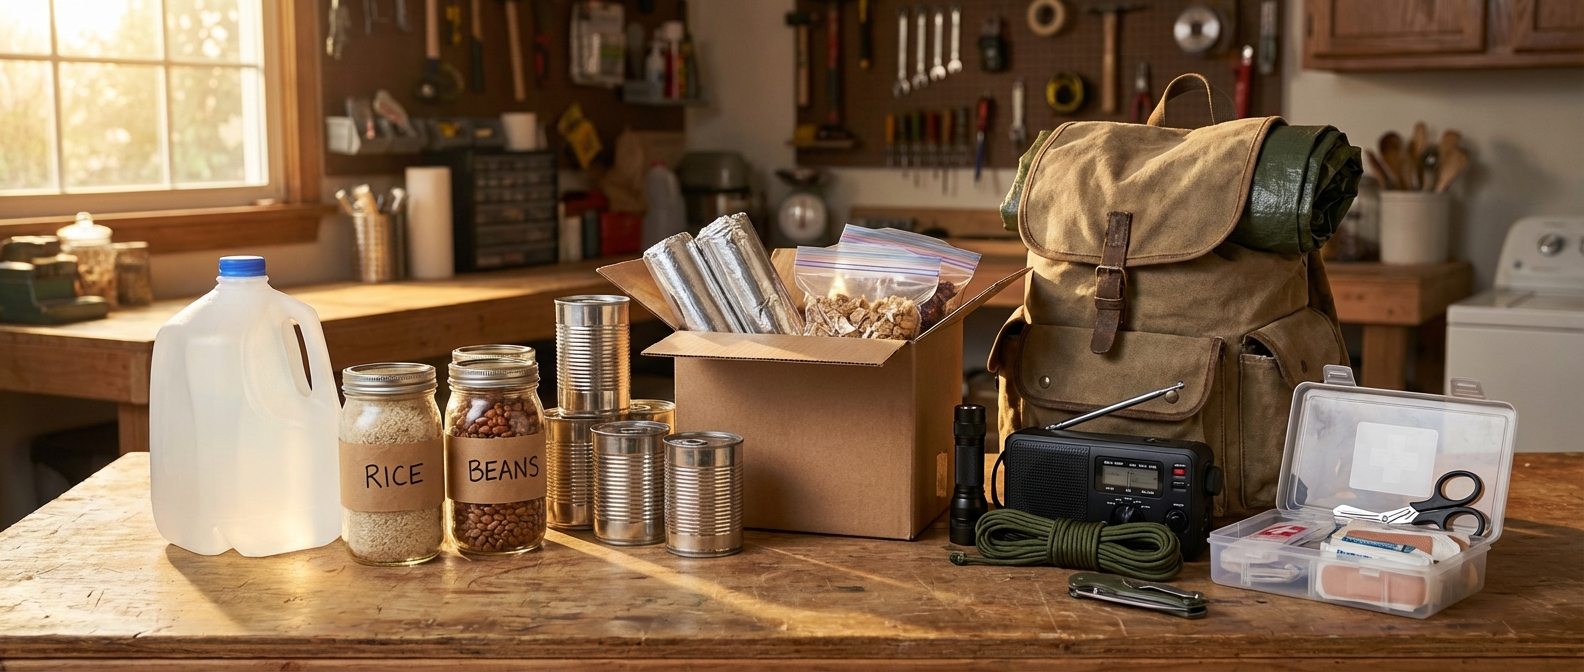
- Assemble a 72-hour kit per person using foods and gear you already use.
- Add 1–2 items each shopping trip and rotate supplies into daily use.
- Choose reusable, multi-purpose items and learn basic skills like first aid and safe water treatment.
What prepping means
Prepping means planning to meet basic needs during short disruptions or emergencies. Budget prepping focuses on inexpensive, reusable, or multi-purpose items and practical skills that save money and reduce waste.
Quick-start checklist: 72-hour kit (per person)
- Water: 1 gallon per person per day for 3 days. Increase for heat, infants, breastfeeding, or medical needs.
- Food: three days of shelf-stable foods you already eat.
- Light: one flashlight or headlamp and spare batteries.
- First aid: bandages, antiseptic wipes, medical tape, basic pain reliever, tweezers.
- Warmth/shelter: a blanket or sleeping bag plus warm layers.
- Power/communication: phone charger and a small tested power bank.
- Documents: waterproof pouch with ID, medication list, and emergency contacts.
- Hygiene/sanitation: hand sanitizer, basic toiletries, and sturdy trash bags.
Priority sequence. Start here.
- Water.
- Food. Expand from 3 days to 7 when you can.
- Light and power.
- First aid and prescription medications.
- Warmth and shelter.
- Sanitation and hygiene.
- A simple plan and communication methods.
Budget prepping tips — practical, low-cost strategies
- Add 1–2 prep items on each grocery trip. For example: one gallon of water, two cans, or one pack of batteries.
- Rotate supplies into regular meals. Label containers with dates.
- Reuse household gear: backpacks, blankets, pots, headlamps.
- Watch seasonal sales and clearance racks for discounts on staples.
- Buy bulk only if you can store and rotate before items expire.
- Check thrift stores and surplus shops for durable gear like tarps and utility tools.
- Choose generic storage tubs, tarps, and store-brand foods over expensive prebuilt kits.
- Skip single-purpose gadgets until you actually need them.
Water: storage and treatment (budget-focused)
- Plan for 1 gallon per person per day for at least 3 days.
- Use clean, food-grade containers. Store them in a cool, dark place and rotate them into use.
- Add one or two gallon jugs on each trip and cycle them into daily water use before their replacement date.
- Treatment methods: boiling (bring water to a rolling boil for 1 minute at sea level, longer at high elevation), unscented household bleach used at CDC-recommended doses, and certified portable filters that meet NSF/ANSI standards.
- Do not assume DIY filters remove all pathogens or chemicals. Confirm treatment steps with official guidance.
Food: staples and rotation
Staples to rotate often:
- Rice, dried beans, pasta, oats.
- Canned vegetables, canned fruit, canned tuna or chicken.
- Nut butters, crackers, and instant side dishes you normally eat.
- Ready-to-eat meals you already like and will actually eat.
Start with three days per person. Expand to seven when storage and budget allow. Label and rotate to avoid waste.
Warmth, shelter, and power
- Blankets or sleeping bags plus layered clothing.
- Flashlights or headlamps with extra batteries stored separately.
- Small power bank. Test it monthly.
- Camping stove and fuel only if you can use them safely and follow local laws.
Never use open-flame devices indoors without proper ventilation. They create carbon monoxide and fire hazards.
First aid, hygiene, and medications
Kit basics:
- Bandages, sterile gauze, adhesive tape.
- Antiseptic wipes and basic topical antiseptics.
- Over-the-counter pain relievers, as appropriate.
- Gloves, tweezers, and small scissors.
- Keep a list of prescription medications, dosages, pharmacy contact, and an approved extra supply if prescribed.
Take an inexpensive or free first aid or CPR course at the Red Cross, a community center, or through local CERT programs.
DIY organization and low-cost storage
- Build kits from pharmacy basics and pack them in pouches or tote bags.
- Reuse jars, bins, and buckets. Label each with purchase and rotation dates.
- Store heavy items low to prevent falls.
- Learn practical skills: sewing, basic home repair, safe water treatment, and cooking from staples.
Community and shared strategies
- Coordinate neighborhood plans and divide supplies and responsibilities.
- Use local resources: free classes, library guides, and emergency management offices.
- Join local or online groups to swap gear and tips. Community groups can reduce individual costs.
Smart shopping examples (one-item-per-trip plan)
- Trip 1: one gallon of water; one flashlight or headlamp.
- Trip 2: two cans of protein or vegetables; one pack of batteries.
- Trip 3: a small power bank; a roll of duct tape or a tarp.
- Trip 4: basic first-aid items such as bandages and antiseptic wipes.
What to avoid buying first
- Expensive multi-tools or branded kits you will never use.
- Large quantities of unfamiliar freeze-dried meals you will not eat.
- Single-purpose items that duplicate what you already own.
FAQ: budget prepping tips (short answers)
Q: What should I buy first? A: Water for three days, food you will actually eat for three days, a reliable flashlight with batteries, basic first aid, and a simple written plan.
Q: How can I build supplies without much money? A: Add one or two items per shopping trip, rotate supplies into daily use, watch clearance sales, and check thrift and surplus stores.
Q: Are premade kits worth it? A: They offer convenience but usually cost more. Building your own saves money and lets you tailor contents to your needs.
7-step action plan for this week
- Pack a basic 72-hour bag with minimum items.
- Buy one extra gallon of water and two cans of food on your next trip.
- Write a simple household emergency plan and list emergency contacts.
- Label stored food with purchase dates and set reminders to rotate.
- Identify local resources such as the Red Cross, Ready.gov, and your emergency management office.
- Take a free or low-cost first aid or preparedness class.
- Check progress in 30 days and add one new item or category.
Notes to verify
- Confirm bleach dosing and boiling times for your elevation with CDC guidance.
- Check certifications for portable filters; do not assume homemade filters remove all hazards.
- Seasonal sale timing varies by region, so watch local retailers.
Reliable sources
FEMA, CDC, American Red Cross, Ready.gov, EPA, and your local emergency management office provide authoritative guidance on health and treatment steps, storage recommendations, and local hazards.
Keywords included: budget prepping tips, 72-hour kit, emergency preparedness