How to Build a DIY Faraday Cage: Step-by-Step EMP and RF Protection for Beginners
Quick answer
A DIY Faraday cage is a conductive enclosure that redirects external electromagnetic energy around its contents. For home preparedness—radios, USB backups, power banks—a well-built DIY Faraday cage blocks many RF signals and low-to-moderate electromagnetic pulses. It cannot guarantee survival against extreme EMPs or grid-level geomagnetic events; use professionally tested shielding for those threats.
Overview
A DIY Faraday cage is any conductive box or wrapped enclosure that prevents external electric fields and radio-frequency waves from reaching devices inside. Build one from a tight-fitting metal container such as an ammo can or galvanized trash can, or by wrapping items in layered insulation and continuous metal like heavy-duty aluminum foil. Ensure continuous conductive coverage, prevent device-to-metal contact, seal seams, and test attenuation with a battery-powered radio or phone.
What a Faraday cage does
A Faraday cage is a continuous conductive enclosure, either solid metal, fine conductive mesh, or layered wraps, that redistributes incoming charge so the interior remains largely unaffected by external electric fields. EMP refers to short, intense bursts of electromagnetic energy such as a nuclear HEMP. A CME describes solar storms that induce currents in long conductors like power grids; small boxes do not protect a grid. RF refers to radio waves—AM, FM, cellular, Wi-Fi—that you can use for practical shielding tests.
The cage works when openings and seams are much smaller than the wavelengths you want to block. Mesh must have apertures far smaller than the target wavelength. For many Wi-Fi and cellular bands that requires a fine mesh or solid metal.
When to use a DIY Faraday cage
Use a DIY Faraday cage to protect small, portable devices:
- Emergency and handheld radios
- USB flash drives and hard-drive backups
- Spare phones and battery banks
- Small sensors and microcontrollers
Do not rely on a DIY cage for mission-critical infrastructure, hospital devices, or whole-house protection.
Key materials
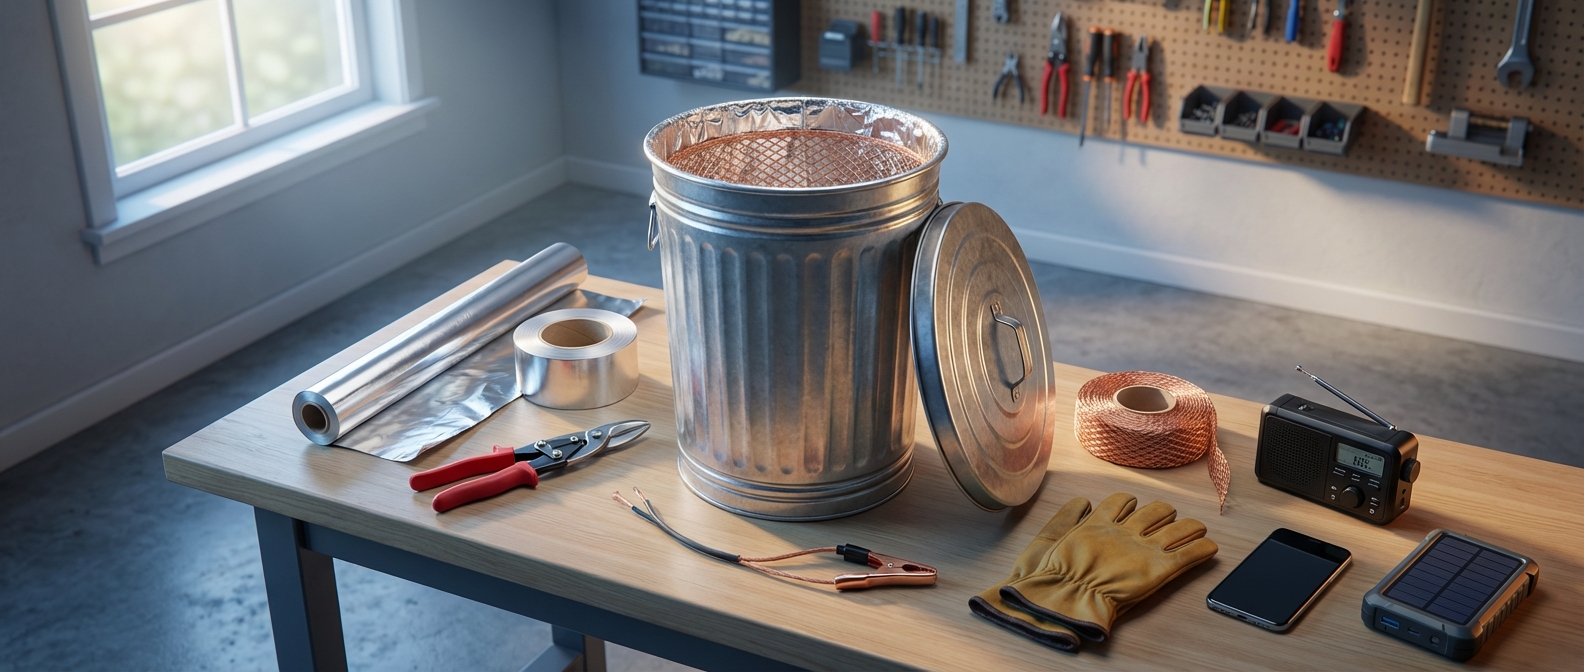
- Metal container: ammo can, galvanized trash can with a snug lid, metal toolbox, or steel tin
- Insulation: cardboard, foam sheets, bubble wrap, anti-static bags
- Conductive tape: aluminum tape for seam continuity
- Heavy-duty aluminum foil: for wrap methods or extra conductive layers
- Moisture control: silica gel packs, sealed plastic bags
- Optional: fine conductive mesh, rubber or plastic gasket material
- Tools: scissors or utility knife, labels, marker
Grounding is not required for shielding itself. Grounding mainly drains static or lightning energy. Do not attempt DIY lightning grounding on structures without a licensed electrician.
Two beginner-friendly builds
Build A — Metal container Faraday cage (best balance of durability and convenience)
- Choose a metal box with a snug lid, for example an ammo can, metal trash can, or toolbox.
- Inspect for holes, large gaps, or heavy corrosion. Small seams are expected but larger gaps reduce shielding.
- Line the interior with non-conductive material such as cardboard, foam, or bubble wrap so devices do not touch the metal.
- Place devices in anti-static bags or insulating pouches; remove long antennas if possible.
- Close the lid tightly and improve seam conductivity with aluminum tape where needed.
- Add silica gel packs and store in a dry place.
Pros: durable and easy to test. Cons: lid-to-body contact must be good and items must not touch the metal.
Build B — Aluminum foil wrap (low-cost and compact)
- Wrap each device in a non-conductive layer like cloth, paper, or bubble wrap to prevent foil contact.
- Completely cover with heavy-duty aluminum foil. Avoid punctures and gaps.
- Add another insulating layer, then a second foil layer. Separate foil layers improve broadband performance.
- Optional: place the wrapped item inside a metal container for extra protection.
Pros: cheap and portable. Cons: foil tears easily and seams reduce effectiveness.
How to test a DIY Faraday cage at home
Home tests measure RF attenuation, not high-energy EMP survival. Passing these tests increases confidence for everyday RF threats.
Simple tests:
- Radio test: tune a battery-powered AM/FM or NOAA weather radio to a clear station, place it inside, close the lid, and expect signal loss or severe weakening.
- Phone test: put a phone inside, close the cage, then call it. If the call fails and the phone shows no signal, some cellular bands are blocked.
- Multi-frequency check: test AM, FM, cellular, and Wi-Fi when possible. Shielding varies by frequency.
These checks show RF attenuation at tested frequencies. They do not show absolute EMP protection across all energies and frequencies.
Common problems and fixes
- Signal still gets through:
- Check seams, lid fit, foil punctures, and device-to-metal contact. Improve seam contact with conductive tape, add metal layers, or rewrap.
- Foil tears or creases:
- Rewrap with heavy-duty foil and put the item in a rigid metal box.
- Loose lid:
- Use a better container, add conductive tape, or install a conductive gasket.
- Mesh or perforated walls:
- Replace with solid metal or ensure aperture size is far smaller than the wavelengths you need to block.
DIY versus professional shielding
DIY Faraday cage
- Advantages: low cost, customizable, useful for small items.
- Disadvantages: variable performance and not certified to EMP standards.
Professional enclosures and Faraday bags
- Advantages: tested shielding effectiveness and engineered seams and gaskets.
- Disadvantages: higher cost.
Use DIY methods for basic preparedness and small-item protection. For mission-critical systems or verified high-level protection, buy professionally tested shielding and consult experts.
FAQ
Q: Can aluminum foil really block an EMP?
A: Properly used, aluminum foil can attenuate RF energy at many frequencies. For high-energy EMPs, you need multiple layers, near-perfect sealing, and laboratory testing to claim effective protection.
Q: Do devices have to be grounded inside a Faraday cage?
A: No. Grounding is optional and mainly for safety such as static or lightning. Shielding works by redistributing charge on the enclosure surface.
Q: What should I store in a DIY Faraday cage first?
A: Start with an emergency radio, USB backups, spare flashlights, portable power banks, and handheld radios.
Q: How do mesh size and wavelength relate?
A: A mesh blocks only if its openings are much smaller than the wavelength to be blocked. For GHz-range signals, a fine mesh or small holes will work. For kHz to MHz ranges you need much finer continuity or solid metal.
Final checklist
- Devices insulated from metal surfaces with cardboard, foam, or anti-static bags
- Container free of large gaps and sealed tightly
- Seams improved with conductive tape if needed
- Items labeled and protected from moisture with silica gel and sealed bags
- At least one radio or phone attenuation test performed
Limitations
A homemade DIY Faraday cage can attenuate RF and help protect small electronics. It does not guarantee protection against all EMP levels, especially extreme HEMP scenarios. Lab-grade testing is required for verified claims.
Small Faraday cages do not protect large electrical installations from geomagnetically induced currents during severe solar storms. Grid protection is a separate, utility-scale problem.
Exact mesh size, aperture dimensions, and dB attenuation depend on frequency and test conditions. Treat numeric claims skeptically unless backed by measurement.
Build a simple DIY Faraday cage for key small items, test it, and upgrade to professional solutions when you need verified protection.